
When I read a book I have the habit of highlighting certain passages I find interesting or useful. After I finish the book I’ll type up those passages and put them into a note on my phone. I’ll keep them to comb through every so often so that I remember what that certain book was about. That’s what these are. So if I ever end up lending you a book, these are the sections that I’ve highlighted in that book. Enjoy!
Uprights
- 36″ – 40″ Spinet
- 40″ – 43″ Console
- 44″ – 48″ Studio
- 49″ + Full Upright
Grands
- < 5’8″ Baby Grand
- 5’8″ – 6′ Parlor Grand
- 6′ – 8′ 10″ Grand
- > 8′ 10″ Concert Grand
Lesson 1
- Just like a house, a piano has a frame that the rest of the piano is built on. On a grand piano, this frame is referred to as a skeleton.
- The piano soundboard is typically made of spruce (Light weight, uniform grain structure, strength). The blank is usually about 3/8″ thick
- The ribs are typically made of sugar pine
- The bridge is typically made of maple or beech (Durability, can withstand constant pressure from strings)
- ribs go against the grain of the soundboard
- The soundboard has ribs that it doesn’t change shape overtime the shape is critical to the sound and the tone of the piano
- The convex shape of the soundboard is known as a crown
- Piano makres usually aim for 1/8″ in crown
- To get the convex shape of the soundboard the ribs have a curve to them and when the soundboard is glued to the ribs you produce this convex bowl
- 4 parts that make up the piano: the action, the tuning, the voicing, and the belly
Lesson 2
- The actual sound comes from the soundboard vibrating. The strings vibrate and their vibration is transfered through the the bridge (What connects the strings to the soundboard) to the soundboard.
- Placing the brdiges in the exact perfect spot on the soundboard is critical to get the best tonal quality. You woouldn’t hit a drum on the side, you hit it in the middle to get the best sound.
- There is a black graphite paint on the bridge, which allows for the strings to move freely when being tuned.
- The bridge pins are copper-plated steel pins.
- The bridges are higher than the plate so that the string produces a cxownward pressure on the plate, called down bearing.
- Strings are made from high-carbon steel wire (Immense strength, elasticity, ability to withstand tension)
- The thickness of the strings is referred to as the gauge of strings
- The bass strings are steel, wound with copper
- As the piano gets shorter, you need more wound strings. In a concert grand, bass strings aren’t as thick.
Lesson 3
- Fortissmo = loud
- Pianimissio = quiet
- On a spinet, if it has ametal sticker (I think capstan?) that attahes to the end of the key stick with a rubber grommet, this is called a standard action.
- A thayer action has a seperate mechanism connected to the action that keeps the stickers in place. (My piano)
- Grands have a repition lever, which allows keys to be played again without fully releasing them.
- The pedals in a grand piano are reffered to as the Lyre
- When pedals are depressed, they move rods upwards. This is called trapwork
- Grand pedals
- Left: Una Cora. Or soft pedal. Shifts the entire keyboard to the right so that the hammers hit 2 strings instead of 3. Creates a quiter tone.
- Middle: Sostenuto. When a note is played and this pedal is pressed, it grabs the damper assembly and holds on to a played note’s damper so it can ring while others are played with the damper still on. On cheaper baby grands it only lifts the damper on the bass notes
- Right: Sustain. Lifts all the dampers.
- Upright pedals
- Left: The soft pedal. Moves the hammers closer to the strings to make notes quiter.
- Middle: Does one of the 3
- Lifts the bass dampers
- Is the practice pedal. Drops a piece of felt between the strings and the hammer to soften the blow
- Is the sostenuto.
- Right: Sustain.
Lesson 4
- The process of maximizing the action parts potential is called regulation
- Action servcing steps
- Tighten all screws
- If the pins are rusted, use a metal polisher (Flitz) and steel wool to clean them off.
- Vaccum, compressed air, then spray lubricant on keyframe pins. (McLube 1725)
- If the back rail felt is not level, the keys will not be level.
- On the key the front hole is called the front rail bushing, the middle hole is the balance rail bushing, and the hole on the bottom in the middle is called the balance rail hole
- If keys are too tight the piano will feel sticky or sluggish, if they are too loose the keys might click or feel sloppy and hit against each other
- Easing keys is opening up those bushings with a key easing pliers to make sure they wobble ever so slightly left and right. There should be just a small amount of play. Not so much that the key displaces from it’s original spot though. You can also use the pin to push back and forth against the bushings so that the key drops smoothly onto the pin
- If you over-eased and the keys are too sloppy, you’re need to soak the bushings with profelt and leave them overnight, they will have swelled the next day and you can re-ease them.
- With the bridle strap, you can bend the wire it’s attached to to create more/less space between the hammer butt and the jack. There should be just a minimal amount of space between the two, just so that they’re not touching. Make sure these wires are not bent left/right so much that they are touching the back check wire on the key next to it. This can create a clicking noise.
- On replacing bridle wires
- 3 options – standard, cork, or clip on.
- Clip on are easiest but not recommended if doing lots of replacements
- Cork is good, you’ll need several different sizes, and the need to glue them (With tacky glue) in when placing them. Once glue is dry then attache the bridle wire. Standard (Just the wire without a cork) is the best option for long term. Have to cut the wire the the proper lenght and re-glue them to the baclk of the back check catcher.
- It’s usually easiest to install the damper pedal rod before putting tightening the action bracket bolts
- To square the key, use a hammer and chisel to tap on the balance rail pin. use a level of sorts to check for unsquared keys
- To space the keys, use the spacing tool. Lift up the key, place the tool below the rest cushion, the twist (Or maybe just move left to right) the tool slightly to adjust the spacing
- If you have loose key bushings, you won’t be able to square or space keys without replacing the key bushing first.
- Space 3 & center things on the action:
- Make sure the hammer is centered on the strings. loosen the hammer screw so it can move a bit, center it on the dstrings, then tighten the screw
- If you can’t move the hammer enough, use hammer traveling tape.
- If a hammer head is tilted, you’ll need to use a heat gun to heat up the shank until it becomes malleable. Move it into place and let it dry.
- The backcheck. Make sure it is centered. Use a wire bending tool to do so.
- If working on an old pieno, it may not be a good idea to move these to drastically unless you want to replace the felts.
- The Capstan. Make sure it is centered. Use a wire bending tool to do so.
- Make sure the hammer is centered on the strings. loosen the hammer screw so it can move a bit, center it on the dstrings, then tighten the screw
Lesson 5
- The main goal of regulating the piano is to maximize the power, control, repetition, and consistency.
- Aftertouch is the amount that the jack escapes from the butt (or knuckle, on grands) when the key is fully depressed. Camn also think of it as the amount that the key travels after the hammer has achieved let off.
- Play the key very slowly but don’t allow the hammer to strike the string. If your action is properly regulated, you will feel a small bump in the key as the jack is tripped out, and the key will go down ideally 1.5mm beyond this point. That final distance the key travels after letting off is our aftertouch.
- If there is too much aftertouch, we will not have as much control, power, or repetition. If there is too little aftertouch, the hammer will likely double strike and there will be a mushy, incomplete feeling in the action.
- If the jack trips out from the butt when the hammer is farther away from the string (and vice versa), the note will have more aftertouch.
- Blow distance is the amount of space the hammer travels from rest to impacting the strings. If the space is decreased (meaning the hammer is closer to the string at rest), there will be more aftertouch.
- Key dip is the distance the key travels from its rest position to being fully depressed. We can adjust that distance by adding or removing paper punchings below the front rail felt cushion. If the distance the key travels is increased or decreased, the aftertouch will also increase or decrease.
- Lost motion is the space between the jack and the hammer butt. There should be a small amount of space but over time this gets bigger and we don’t want that.
- To set this properly, Use a capstan wrench to adjust the capstan screw so that the backcheck moves just slightly before the catcher.
- We set the lost motion, then we set the blow distance, then we set the lost motion again. If we don’t adjust the lost motion first, the excessive lost motion can cause the keys to dip down and give use a false sense of key level.
- A good height for keys is anywhere between 17 -22mm. This distance is from the top of the key slip to the underside of the keytop. If you set the height to 21 mm and the bottom of the lkey exceeds the key slip, you’ll need to move it down. The bottom of the key should not show. Similarly, if the height is set to 21 and there is no space between the key and upstop rail, you’ll need to adjust it down. You need to find the middle ground in which the key has room between the keytop and the fallboard, and looks good compared to the key slip.
- Always place punchings below the felt
- The sharps should be set to 13mm above the naturals
- To set the key height:
- Load up the A0 key with punchings on the front rail cushion to the desired height.
- Measure that height and use it as a baseline for the C8 key
- Put a leveling stick across those keys
- Check for too high keys by placing the leveling stick down several times and seeing if any keys move
- Remove paper punchings on the balance rail under the high keys until they are level
- Then add punchings to keys that are too low
- Try tapping all the keys from the underside too see if they make a click sounds that signifies they are too low
- Then do the same for the sharps. You might not be able to prop up the end sharps so instead you just need to rest the leveling stick vey lightly on the shraps or measure each on individually to 13mm above naturals height
- Steinway pianos have a crowned set of keys compared to perfectly straight
- Wood expands with a high moisture, and contracts when mositure is low
- To adjust the let-off, we turn the screw attached to the let-off button up or down. When we turn it up, we make the hammer let off closer to the strings, thus decreasing the total amount of aftertouch. Turning the screw down makes the let-off farther from the strings and increases the total amount of aftertouch.
Lesson 6
- The upright action is known as a single escapement mechanism, and as such, the design has some limitations when it comes to repetition.
- With the single escapement action, the key needs to be almost completely back in its rest position before the note can be struck again. However, the grand action remedies this issue by means of its double escapement design.
- NEVER press down on the keys while removing the action from a grand. You’ll snap the hammers off
- when lubricating the pins on the grand action also spray the sides and the front and the back so the keybed can slide easily
Lesson 10
- The A4 key is tuned to 440hz, all other kleys are tuned relative to that key.
- Once the pitch note is set, then build a temperment (Tune all the keys in an octave relative to that pitch note)
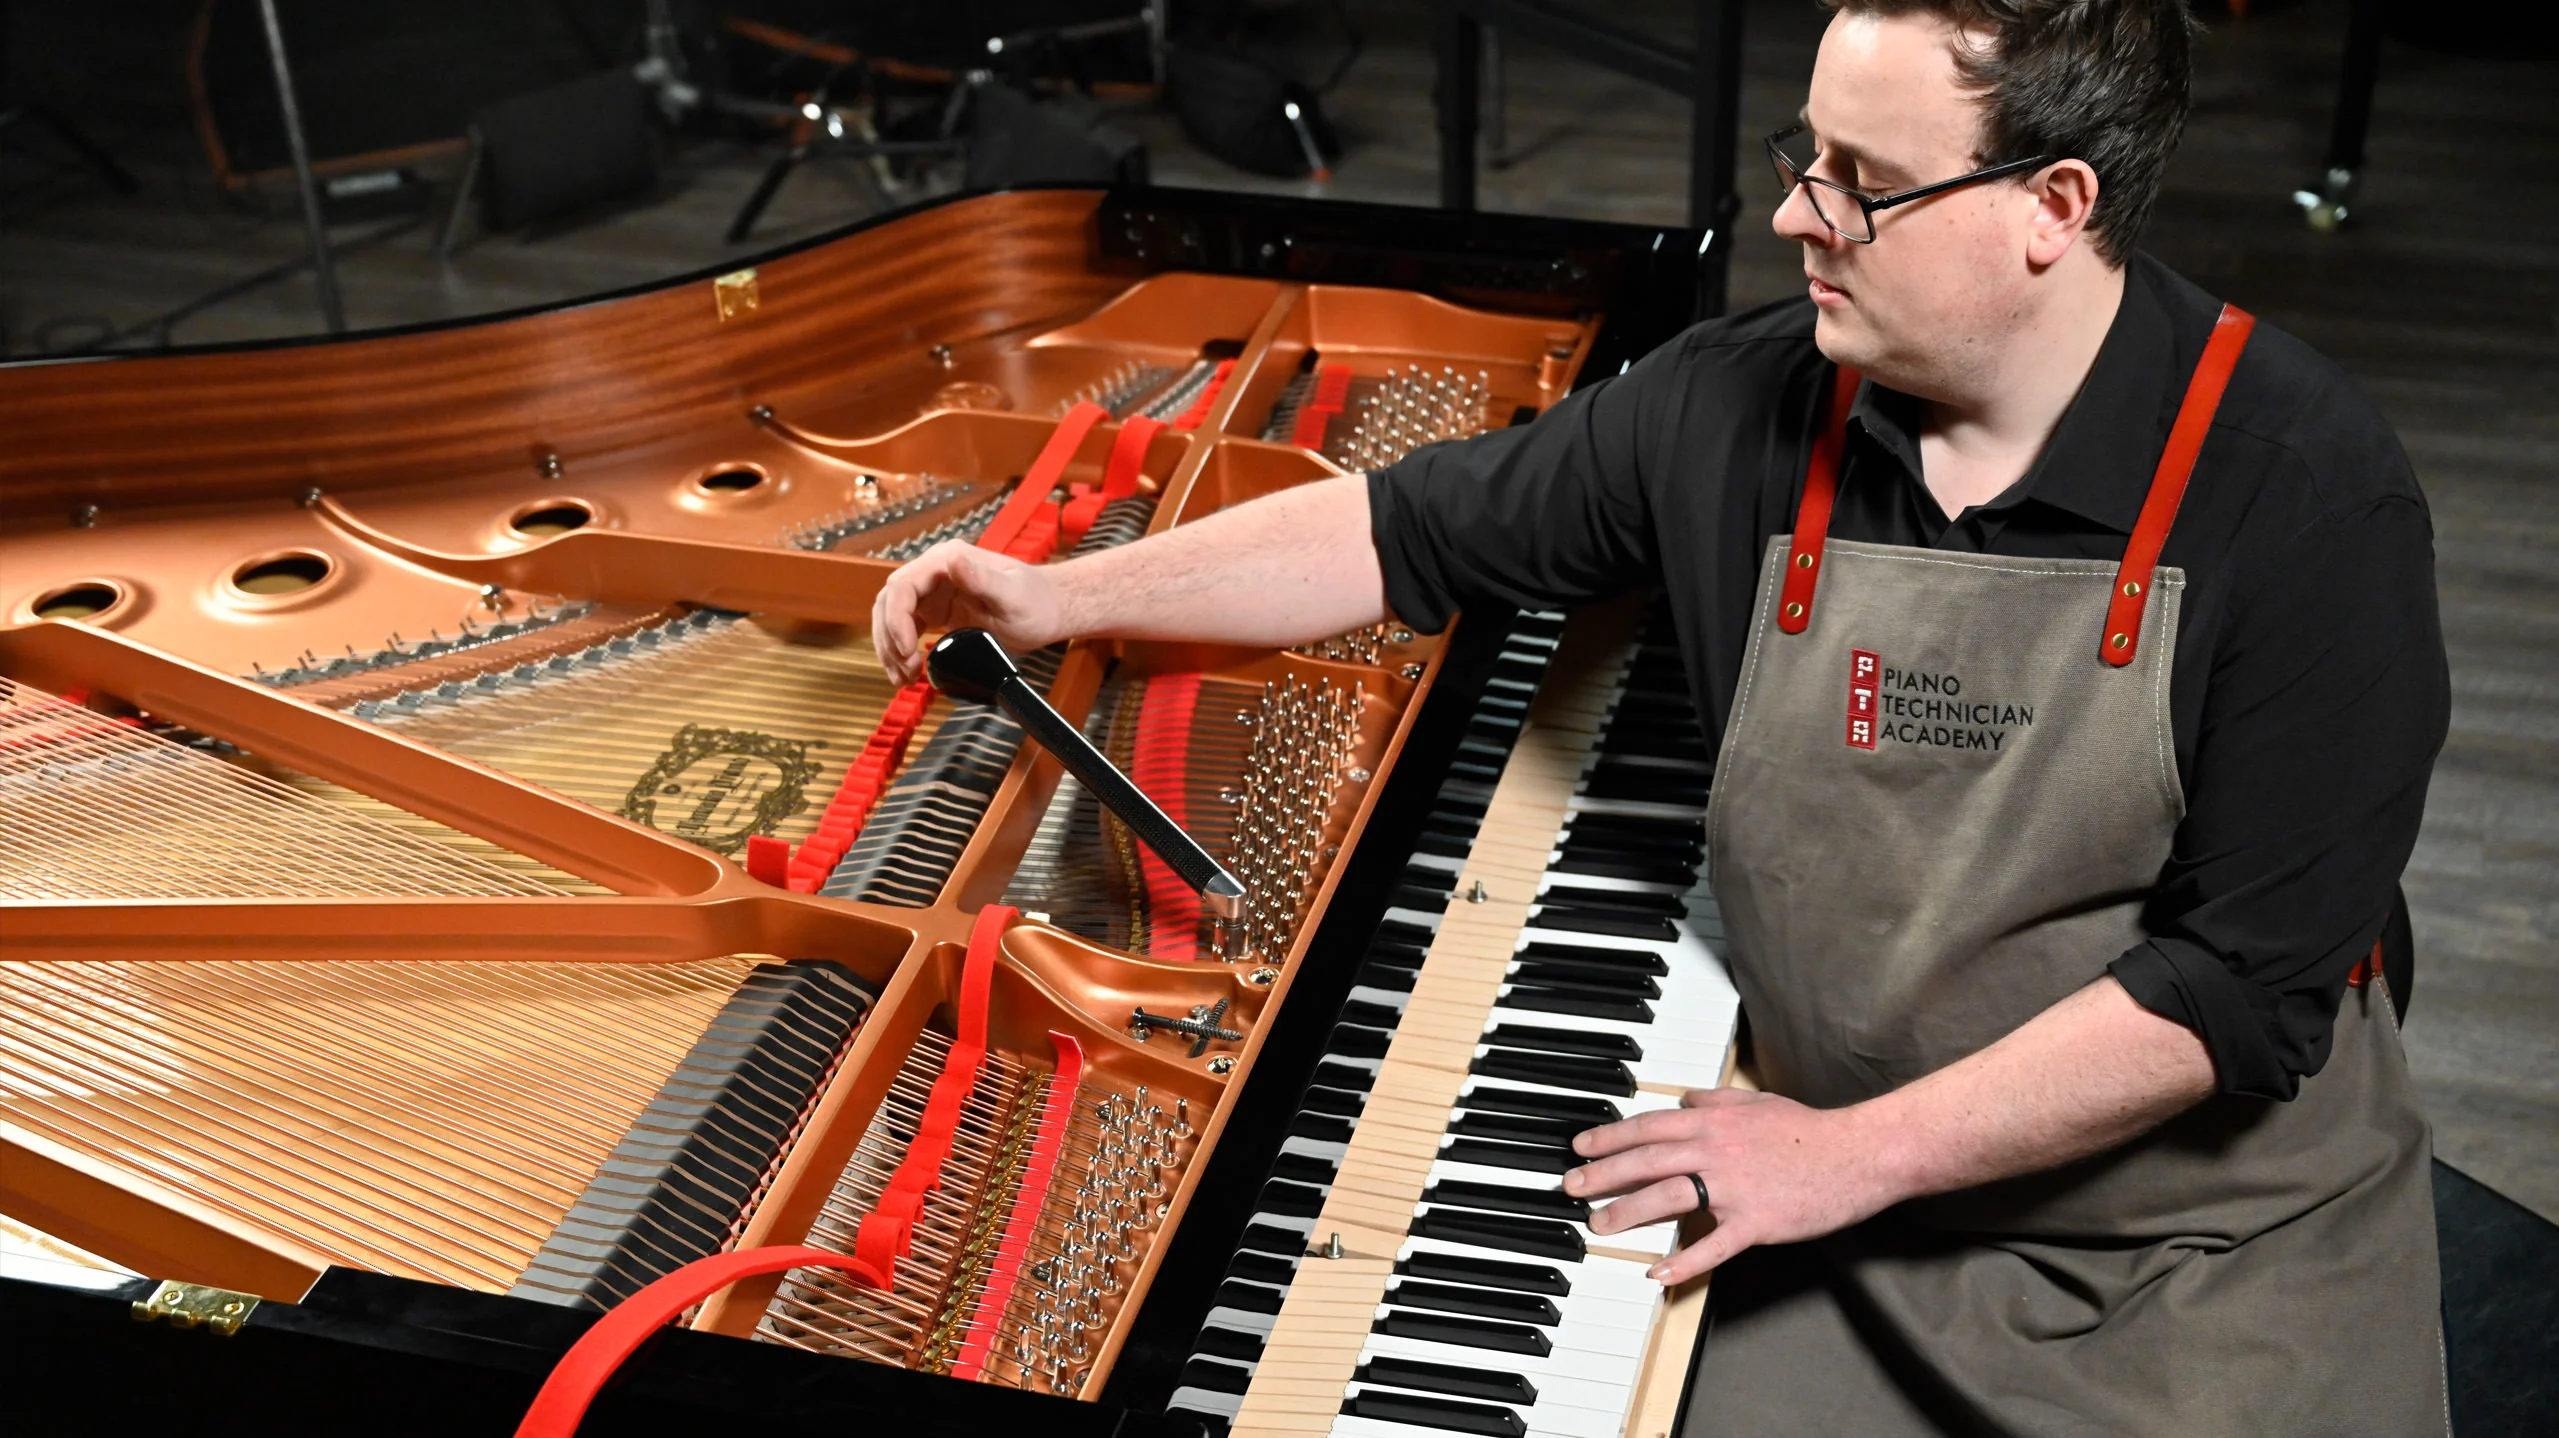
- Aural tuning is done with a temperment strip (to mute 2/3 of the strings). Once the un-muted note is tuned, the temperment strip is removed and the other 2 strings are tuned to match the in-tune one
- A group of two or three stings per note is called a unison
- If the tuning fork is heated (perhaps from being left in a hot car all day), then the pitch of the fork will be slightly lower than 440Hz; the opposite is true for extreme cold.
- Higher the Hz = higher the sound
- Partials are the fundamental frequency + the overtones
- Overtones are only the partials above the fundamental frequency
- Out of the 3 partials that make up a tone, the fundamental partial (lowest and biggest wave) is the one we usually most closely associate with the note.
- Over time, the 2 upper partials tend to get louder, and can overshadow the fundamental partial. That’s what makes an insurment bright, harsh, or tinny
- Lower notes have around 4-6 partials, higher notes have 8-12
- How to find the first 8 partials:
| Fundamental (first partial) | A2(110Hz) |
| Second partial | A3 (220Hz) octave above the 1st partial |
| Third partial | E4 (330Hz) 5th above the previous partial |
| Fourth partial | A4 (440Hz) 4th above previous partial |
| Fifth partial | C#5 (550Hz) major 3rd above previous partial |
| Sixth partial | E5 (660Hz) minor 3rd above previous partial |
| Seventh partial | G5 (770Hz) Minor 3rdish above previous partial |
| Eighth partial | A5 (880Hz) minor 2ndish above previous partial |
- For perfect partials, you would need a string exactly half the length of the previous string. But that would make the piano way too long if you scaled up. So string weight and size accounts for this. But that also means the partials will never be perfect multiples. This idea is referred to as inharmonicity.
- If two tones are perfect, they ring. If one is slightly off, we can head an audible beating sound. The further away the notes are, the faster the besting gets, until it just becomes an audible coarseness.
- Each interval has to be tuned either wide or narrow to create a proper temperment
- Octaves – Throughout the piano, octaves are tuned wide of pure by roughly half a beat per second. Practically, this means that we tune the octave to sound pure and then widen it out just a hair until it has a slow roll in the tone without a distinct beating sound. Listen for 4:2 partial (Which means listening to the 4th partial of the bottom note of the interval, which also happens to be the 2nd partial of the top note)
- Perfect 5ths – Spans 8 half steps. Should be narrow of pure. Should beat slighty faster than your octaves and slighty slower than your 4ths (3:2 coincident partial)
- Perfect 4ths – 6 half steps. Should be wide of pure by one beat per second. (4:3 coincident partial)
- Major 3rd – 5 half steps. Should be wide of pure, but increases in beats as you walk up the scale. (5:4 coincident partial)
- A coincident partial is like 4:2 or where the first number is the 4th partial from the bottom note, and the second is the 2nd partial from the top note
Lesson 11
- If you use a test blow in one of the strings drops down in pitch, you likely didn’t move the pin inside the pin block
- When the technician turns the tuning pin, imagine that there is a certain amount of flex in the pin before the base of the tuning pin moves inside the pinblock.
Lesson 12
- fast-beating and slow-beating intervals. Many technicians have a harder time hearing one category and so favor the other when building their temperaments. Because of this, you will often see temperament sequences that use only 4ths and 5ths or only 3rds and 6ths.
- We hope that in laying out the temperament sequence as we have, you can see how this part of tuning is almost like a puzzle with many different branching choices. If you understand how the intervals interact, you can really follow any sequence. With that in mind, it is a good idea to always check your work against multiple intervals as you tune each note.
- Tuning into the low bass or the high treble is where a lot of variation can occur between technicians, as preferences on stretching octaves come into play. While these sections can be difficult to master, thankfully, there is usually a lot of grace to be had because of the difficulty. So, take your time, practice often, and listen to other technicians’ or musicians’ feedback so you can constantly refine your techniques.
- The pitch raise is essentially just a quick and dirty tuning to get the tension closer to pitch than it originally was. After this, we do a more refined tuning that should last longer than the initial pitch raise alone. Keep in mind that large changes in tension can be detrimental to strings if they happen to be very old, so proceed with caution as you do these and be sure to communicate the risks of string breakage with your customer before doing a pitch raise.
Lesson 14
- The wool of the hammer undergoes a process called fulling, through which it is worked together to create maximum interlocking of fibers using heat, steam, water, and pressure. The best manufacturers of hammer felt can use this process to create an incredibly consistent product that gives the voicing technician a more predictable hammer to work with.
- Conversely, felt manufacturers that need to pump out a lot of products more cheaply and quickly tend to use shorter fibers that have a harder time interlocking. To make the fibers stick together and later survive the pressing process it will undergo, the manufacturers use a significant amount of heat and pressure. This makes a felt that is very dense, harder to work with, and a lot less stable/predictable. On these hammers, the voicing technician is severely limited in the options available to them, and many of the changes they can make are short-lived.
- when shaping hammers, it is usually best to keep whatever shape you find on that individual piano
- the hammer shape plays a big role in how large the contact point is when the hammer hits the string
- Make a habit of squeezing the shoulders of the hammers on every piano you come across and see what kind of movement you have in the felt; then compare that to the sound coming out of the instrument in front of you
Lesson 15
- If you’re working with a customer, ask them if there is a note that they find to be particularly beautiful. Ideally, they would be able to come up with some notes through each section that they like on their instrument. These notes will be a reference to you as you continue your work. The goal will be to match the tone and the color to those notes that your customer has picked out.
- A hammer that bounces slowly tends to have a softer and more fundamental, heavy tone, while a hammer that bounces quickly has a sharper, more brilliant tone
Lesson 16
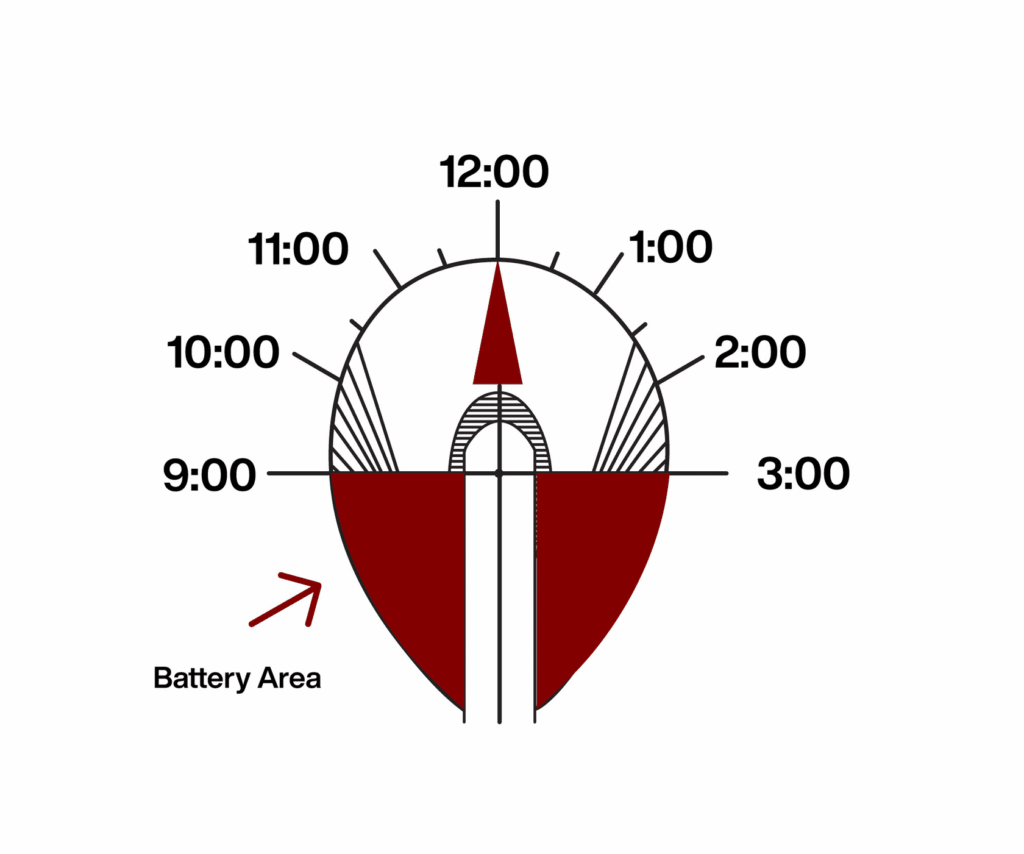
- The tension is greatest at the crown, and that is where much of the hammer’s brilliance on the attack comes from and where it can be adjusted. For that reason, any needling that we do directly on the crown should be very minimal and very shallow. The compression is also greatest directly underneath the crown and down to the molding of the hammer. There is a triangular section in that region that should be avoided by needles at all costs to preserve the core sound of the instrument.
@joekotlan on X